
Blog
Blog

Well…you do! Renters insurance is a must for anyone who is a resident in someone else’s property. A landlord’s property insurance covers damages to a building due to flood, fire or other types of damage. This insurance doesn’t cover the resident’s personal belongings. That is what a renter’s insurance policy does. What does Renters Insurance Cover? Who pays for your stolen lap top when your home or apartment is broken into? If you don’t have rental insurance, you do! With this coverage you could receive replacement value for this item. What if the building is damaged by a fire? Your belongings are wet, covered in smoke and building debris. Renters insurance will not only pay to repair or replace personal positions, some policies will pay for a place to stay. Your cell phone and luggage are stolen out of your vehicle. These may also be covered and replaced. How much does it cost? Usually this type of coverage is inexpensive. Coverage for $15,000 of personal property coverage and $100,000 of liability coverage, could run approximately $15.00 per month. This will vary depending the type of coverage you chose and the area you live in. Talk with your insurance agent or look for quotes online.
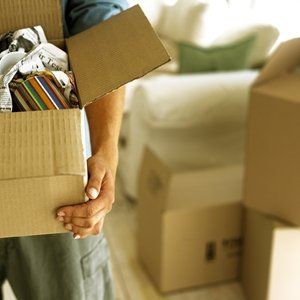
Getting overwhelmed with your move? Try these tips! Call rental trucks, movers, cleaners and storage facilities if needed. Supplies: Boxes, scissors, tape, bubble wrap, newspaper, marking pens and bags. Schedule donations for items you don’t want to move. Place your change of address and call utility companies to transfer or discontinue their service. Plants: Stop watering 3 days before you move. Food: Use what you can beforehand and check expiration dates on condiments. Rugs: Clean and rolled up inside out with tape for easy transport. Pack one room at a time. You will feel more organized. Label your boxes by room and item descriptions for easy placement when unloading. Use towels, pillows, and blankets to pad breakable items and mark boxes as fragile. Put heavy items such as books in smaller boxes and keep bigger boxes for lighter items. Keep clothing on hangers and in drawers when possible. Keep tools used to disassemble items handy to reassemble at your new home. Place screws in a baggy and tape to the inside of the furniture to keep them all together. Pack a suitcase with clothes, first aid kit, medicine, toiletries, and sunscreen if it’s summer. Keep a grocery bag with paper plates, plastic utensils, bottles of water and menu for take-out. Assemble and make your bed first. So that after a day of moving boxes, you don’t have to make your bed before you can crash. Welcome home!
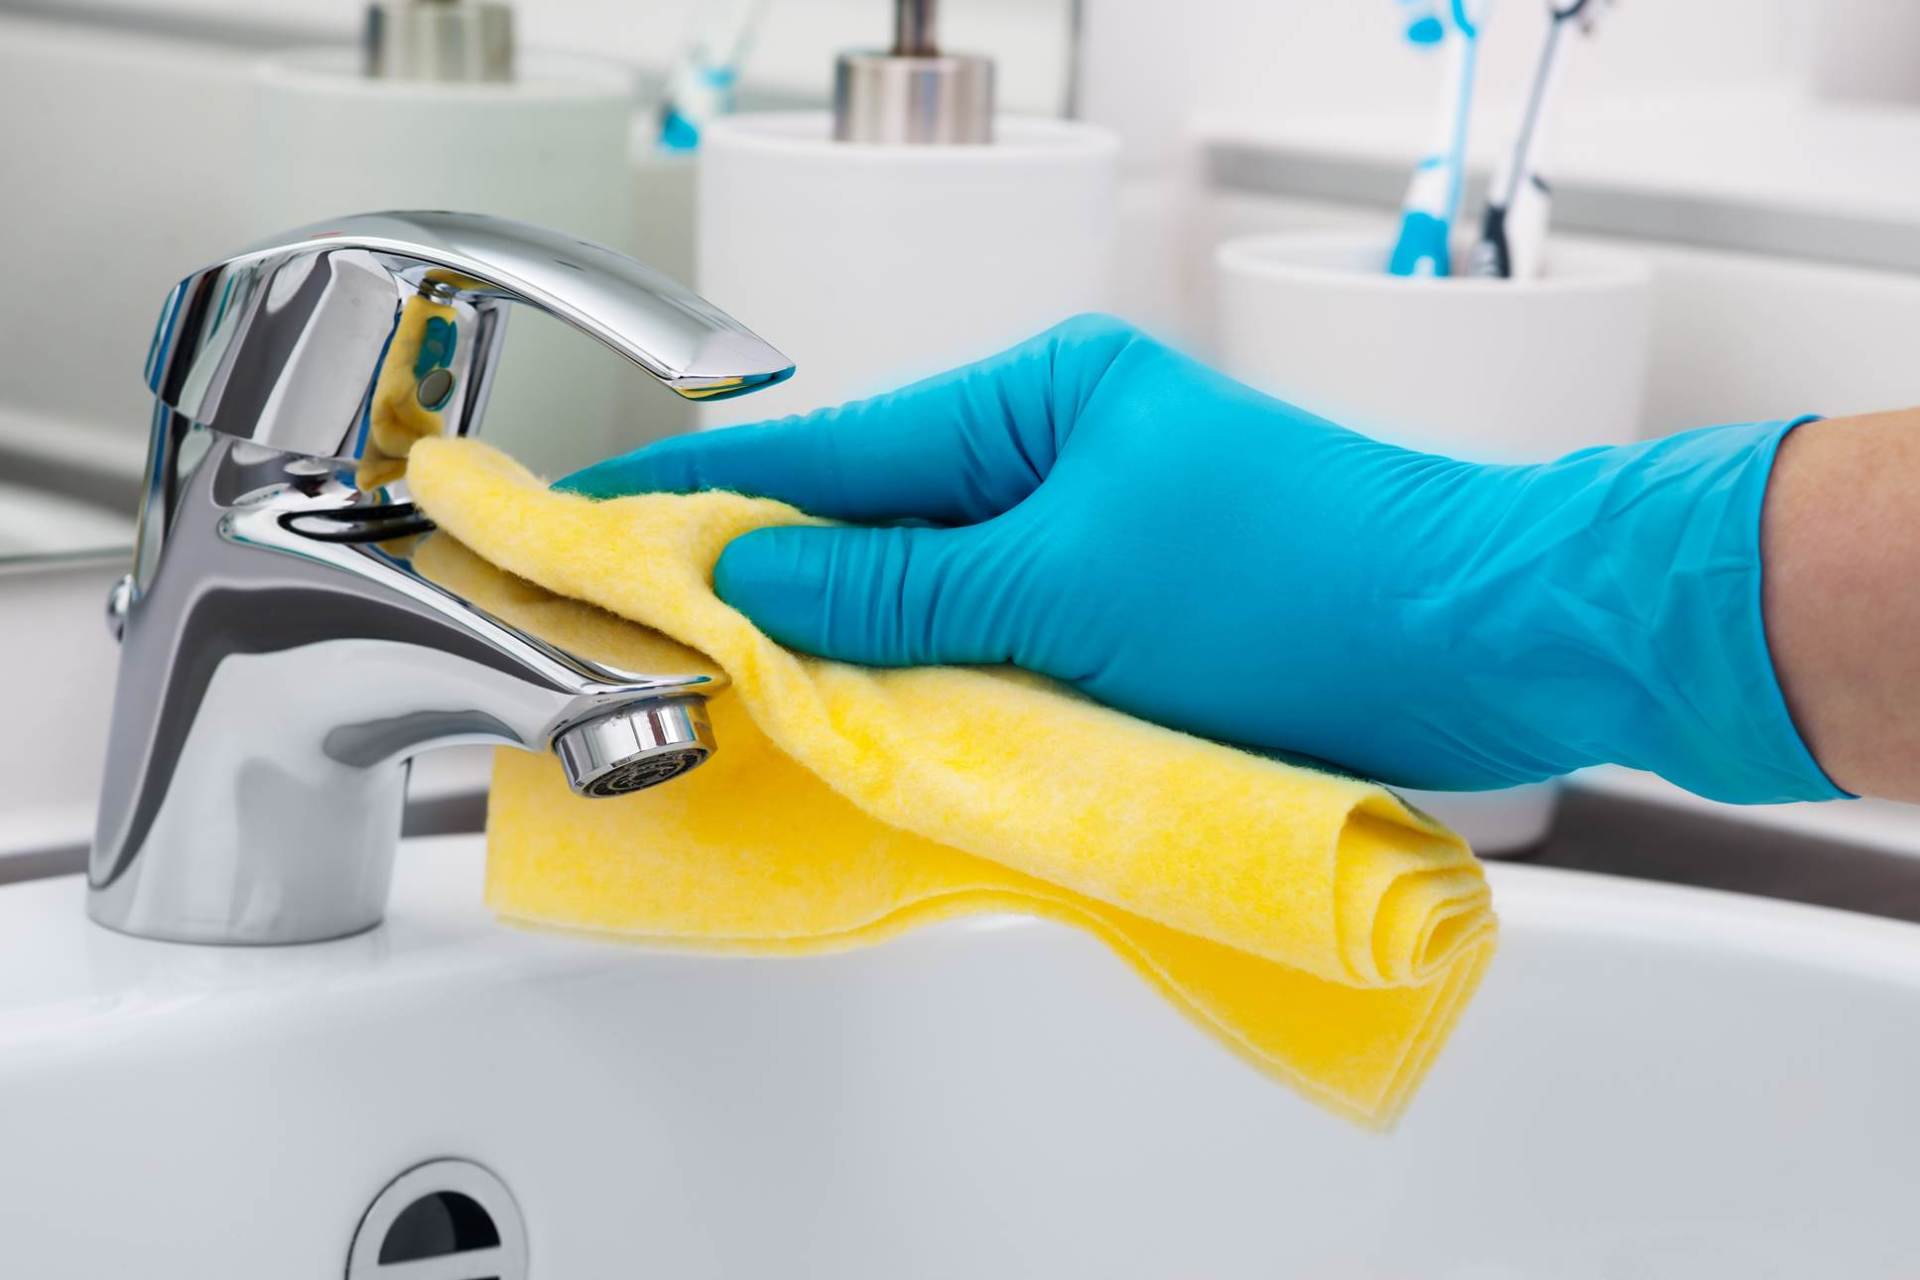
Moving into a new home or apartment is a lot of work! Use this list to help make move-in day and the days after survivable. Listed are some items that will help you keep your home functional and clean. Moving Day Essentials Be sure to pack a kit filled with items that will help make move-in day a little easier. Bottled water and snacks Napkins or Baby Wipes Phone numbers for your Property Management Company as well as the address to pick up keys. Phone numbers for a local Pizza or take out restaurant (no one wants to cook after a long day moving boxes) Cleaning Essentials Scrub Free Clean Shower Daily Cleaner (helps to keep soap scum from accumulating) Toilet bowl cleaner and brush Magic erasers (works great for showers and sinks as well as scuffs on walls, use a light touch on painted surfaces so as not to mark the paint) Read precautions Window cleaner (use on mirrors and outside of appliances) Paper towels Sanitizing wipes Kitchen garbage bags/ Trashcan Broom and Dust Pan Mop and bucket (Swiffer wet jet is a two in one system, just use their disposable cleaning pads) General purpose cleaner or Vinegar, Baking Soda and a spray bottle for the recipe below. Rubber kitchen gloves Other Essentials Toilet Plunger and soft bristle scrub brush Hair trap for bathtub (helps to prevent costly bathtub clogs) Toilet Paper 2-9 Volt batteries (use in smoke detectors, when needed) Flashlight W/extra batteries Basic Tools (hammer, flat and Philips screwdriver, 1-inch nails for hanging pictures) Pencil and Pad for notes or shopping list Oven Mitt’s / Potholders Kitchen towels and washcloth Dish Soap/ Dishwasher Detergent (Remember not to put liquid dish soap in the dishwasher) Frying Pan/Sauce Pan Laundry Detergent/ Basket Remember, it is much easier to maintain a clean home and not play catch up later. The following are a few tips to help you. Soap residue, minerals, dirt, oil, skin cells and bacteria…… the scum coating bathroom fixtures worldwide is more than just soap. It builds up shower after shower, bath after bath, and becomes increasingly difficult to remove if you don’t deal with it. For easy solutions to this sticky situation, consider the tips below. Preventative Measures – Most liquid bath gels are detergents rather than ‘real’ soaps, so they are less likely to cause soap scum. Ditch the bar and lather up with a liquid instead. Avoid oily bubble bath products, which are notorious for causing ‘ring around the tub.’ Finally, purchase a shower squeegee to help dry shower walls and doors. This will help to prevent soap scum build up as well as get rid of mold-inducing moisture. Store sanitizing wipes, toilet cleaner and brush under the bathroom sink. Keeping these items handy is the key to doing quick cleanups.
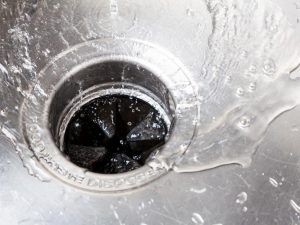
How to Use, What to Put In & How to Clean If you have a garbage disposal, I’m sure you will agree that it is a convenient appliance to have in your kitchen. The following are some best practices for using, adding foods and keeping this handy tool clean and running strong. How to use Start by turning on a strong stream of cold water. Run the water into the disposal side of the sink. Turn the power switch to the disposal to the on position before adding any food. Add small amounts of food gradually into the disposal giving it time to grind and flush contents before adding more. When disposal has finished grinding food waste, continue to run water for a few seconds. This will flush any remaining particles down the drain and will prevent clogging. Pay attention to the sound of the disposal while grinding. This sound will change when it has completed its task indicating that it is time to turn it off. What to Avoid Grease and Oils can coat the inside of the disposal and pipes causing other foods to stick to it forming a clog. Some foods such as salad dressings & marinades have oils in them. Using cold water will help oils and fats to remain solid as they flush through. Potato peels easily stick to pipes because of their high starch content. Stringing foods like celery and artichoke leaves can wrap around disposal blades causing them to bind. Bones, nuts and pits can dull blades as well as lodge in pipes. Pasta is also a starchy food that if not flushed completely through pipes can expand and form a blockage. Nonfood items like plastic, metal and glass can jam the blades of the disposal. What can be put in the Disposal? Most leftover food items, such as meats, fruit and vegetables as well as food prep waste. Use care when disposing of coffee grounds and egg shells as these can sit in pipes causing a “slow drain” and may eventually lead to clogs. Add small amounts of these items at a time and flush with plenty of water. How to Clean Add ½ cup Baking Soda to disposal Follow with 1 cup White Vinegar, allow to set for a few minutes Pour a medium sized pan of boiling water down drain, wait 5 minutes Turn on cold water and disposal and flush for a few minutes Freshen with a small amount of citrus peels For help with unclogging or resetting your disposal, go to Mallard Properties YouTube video How To Fix a Garbage Disposal
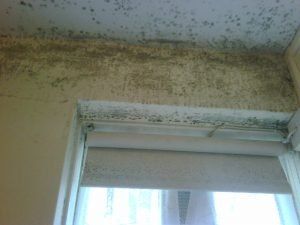
Having trouble with your garbage disposal or other items in your home? Watch our Maintenance Virtual Tour YouTube videos! These videos are designed to help save you a possible service call fee. Find videos on our website here https://www.mallardproperties.net/maintenance-virtual-tours/ or, Mallard Properties YouTube page https://www.youtube.com/channel/UCW34oe3wHrTVta5nZJO_ihg One of the most common preventable maintenance items we face is mold and mildew clean up. Your help with this is appreciated and very necessary! To help prevent the growth of lifestyle mold use fans in kitchens, laundry areas and bathrooms, especially when showers are in use. Leave interior doors open as often as possible to allow air and heat to circulate. Good air circulation will help prevent lifestyle mold from forming. Leave a few inches of space between the walls and your possessions. Eliminate sources of moisture, such as aquariums, and wipe down windows and window sills. Raise blinds off of the window sill by an inch or two to help air movement. Periodically check to make sure that the dryer vent hose is connected. This helps pull moisture out of the building as well. Keep your thermostat for heating set on at least 60 degrees to help dry out moisture in the air. To eliminate existing lifestyle mold , Use a mold abatement product, such as Home Armor Mildew Stain Remover Blocker (as with all cleaning products use only as directed and do not mix cleaning products). Here is link a YouTube video explaining prevention and cleaning of mold.

Carpet Basics Q. How often should carpets be vacuumed? A. At least once a week, more often for high traffic areas. Frequent vacuuming prolongs the life of your carpet by preventing a buildup of gritty particles that can cut carpet fibers. Q. How long should it take to vacuum my carpets? A. Take your time vacuuming. Quickly vacuuming your carpets will get the surface debris. However, the dirt and dust that damages carpeting will still be down low in the fibers. Go over each section of carpeting several times. This will raise the pile of the carpeting allowing small particles to be extracted. Q. Are there areas of the carpet that should be vacuumed more than others? A. Yes, high traffic areas, as well as areas where people sit and move their feet. Vacuum these areas using crisscross patterns overlapping strokes. Also be sure to use crevice tools to clean around baseboards and hard to reach areas. Stain Removal When living with carpeting, it’s not if something gets spilled on it, it’s when will it happen? As tempting as it is to move furnishings to cover spills, it’s really not the best solution. Besides, it may look a little strange with your ottoman placed in the middle of the room with nothing else around. Many items spilled on carpet are not that difficult to remove. The most important thing to remember, clean spills up immediately after they occur! Q. Should I rub or dab carpeting while cleaning a spill? A. Don’t rub the spill! Rubbing can spread the problem to a larger area. It can also fray carpet fibers, causing a spot that looks worn. Q. Should I use commercial carpet cleaning products? A. Commercial cleaning products should be used sparingly if at all. These types of products can leave behind a film that will attract dirt in the future. Always be sure to test a small inconspicuous area of the carpet prior to use. Q. What type of rag should be used for clean up? A. Use a white towel to avoid bleeding of the color of the towel onto carpeting. You may need more than one to remove excess moisture. This can be done by stacking a few towels on the wet area and putting something heavy on top. Q. What can I use if I should stay away from commercial cleaning products? A. That is a good question! Here are some tips for some of the most common spills. Many stains like Gravy, Salad dressing, Urine and Coffee can be cleaned up using a mixture of 1 tsp. mild detergent, 1 tsp. white vinegar and 1 qt. warm water. First wipe or soak up as much of the spill as possible. Apply the solution to the spot. Soak solution and stain up with white towel. If the stain remains, repeat. Let the carpet dry and vacuum. Candle Wax & Chewing Gum: Press an ice cube against the stain. After the wax or gum harden, gently pull it off of fibers. Red Wine: When red wine is spilled on your carpet, dilute it with white wine, then clean the spot with cold water and cover with table salt. Wait ten minutes, and then vacuum up the salt. Mud: Allow the mud to dry completely and then lightly brush or scrape off as much as possible. Use the above mentioned solution to clean the mud. Repeat as necessary and dry thoroughly with white towels. Vacuum gently after carpet is dry. Tip for odors Vacuum up a small amount of baking soda into the bag of your vacuum cleaner. This will help absorb odors that could cause the air to smell stale after. Keeping your home vacuumed will expand the life of your carpeting as well as keep down dust and allergens. Happy Cleaning!

Spring is here! The bulbs are blooming. The grass is growing. Bees are buzzing around. A sure sign that summer is on its way! And then there are the Ants! No one wants them in their home! However, you could be inviting them in without really knowing it. Life is busy and it’s easy to let little things, like dishes and garbage, go to the end of the to-do list. That overflowing garbage can or sink full of dirty dishes is an open invitation to these six-legged creatures. As they say “an ounce of prevention is worth a pound of cure!” A few things you can do to avoid a visit; empty the garbage frequently. Don’t leave dirty dishes in the sink. If you have a dishwasher, load dishes in it at each time you have an empty dish. Run the dishwasher often. This will eliminate the odor that can attract ants and other bugs. Besides, your dishes may come out cleaner if you aren’t overloading it. Keep counters wiped down. Sink clean of food debris and floors swept. Too late? The Ants are marching all over your countertop! There are many products on the market to take care of these pests. You may even find some homemade ideas. We like to use Terro. This is a clear liquid that attracts the ants to it. Once they find it, they take it back to their nest and tell their friends about it. You may notice a temporary increase in the number of Ants at first. Since Ants love to share, it won’t be long until they disappear. When all else fails, it may be time to call an exterminator. Keep in mind this process can be very invasive, which requires the resident’s to do a major clean up before treatments can be done. Also, pest control/removal can be billed to the residents if they are found to be inviting them in by not following the above listed preventative items. If you are a resident of a rental property, be sure to check with your landlord for a list of preferred vendors. Happy Spring!

If this is your first visit to our website, welcome. If not, welcome back! You may notice a new look to our site! Something that we are very pleased to have up and running! Much of the content you will find here is similar to what was on our previous site. However, the new format is much more user-friendly. Find documents to print under resources on the Tenant & Co-signer’s tab. Forms such as applications and co-signer agreements can be printed, completed and emailed to our office. In February, applications for specific properties can be submitted online. Completed co-signer forms can be scanned and attached to the application along with a copy of photo identification. Residents will continue to have access to online payment and maintenance request options. Information explaining a co-signer’s roll as well as how Oregon law works in this situation can also be found. We now feature our portfolio. Here you will be able to view all of our lovely properties. Available properties for the 2018-19 lease period will be posted to our site during the second week in February. New this year is the option to be put on a waitlist for a specific property. Find more information in resources in the Tenant & Co-signer’s tab. We are happy to answer questions and provide more information about our properties and becoming a resident with us.

1953 Garden Ave, Eugene, OR 97403, United States
Office 10:00am-5:00pm
Maintenance 8:00am-3:00pm
Associations & Affiliations